
Starting something is never easy, especially when it comes to working with traditional art mediums. Unlike with digital art, there’s no undo button. No matter how many times we heard the words “happy little accidents” growing up, the fear of misplaced paint splotches and shaky lines is enough to give pause to even the most seasoned artist.
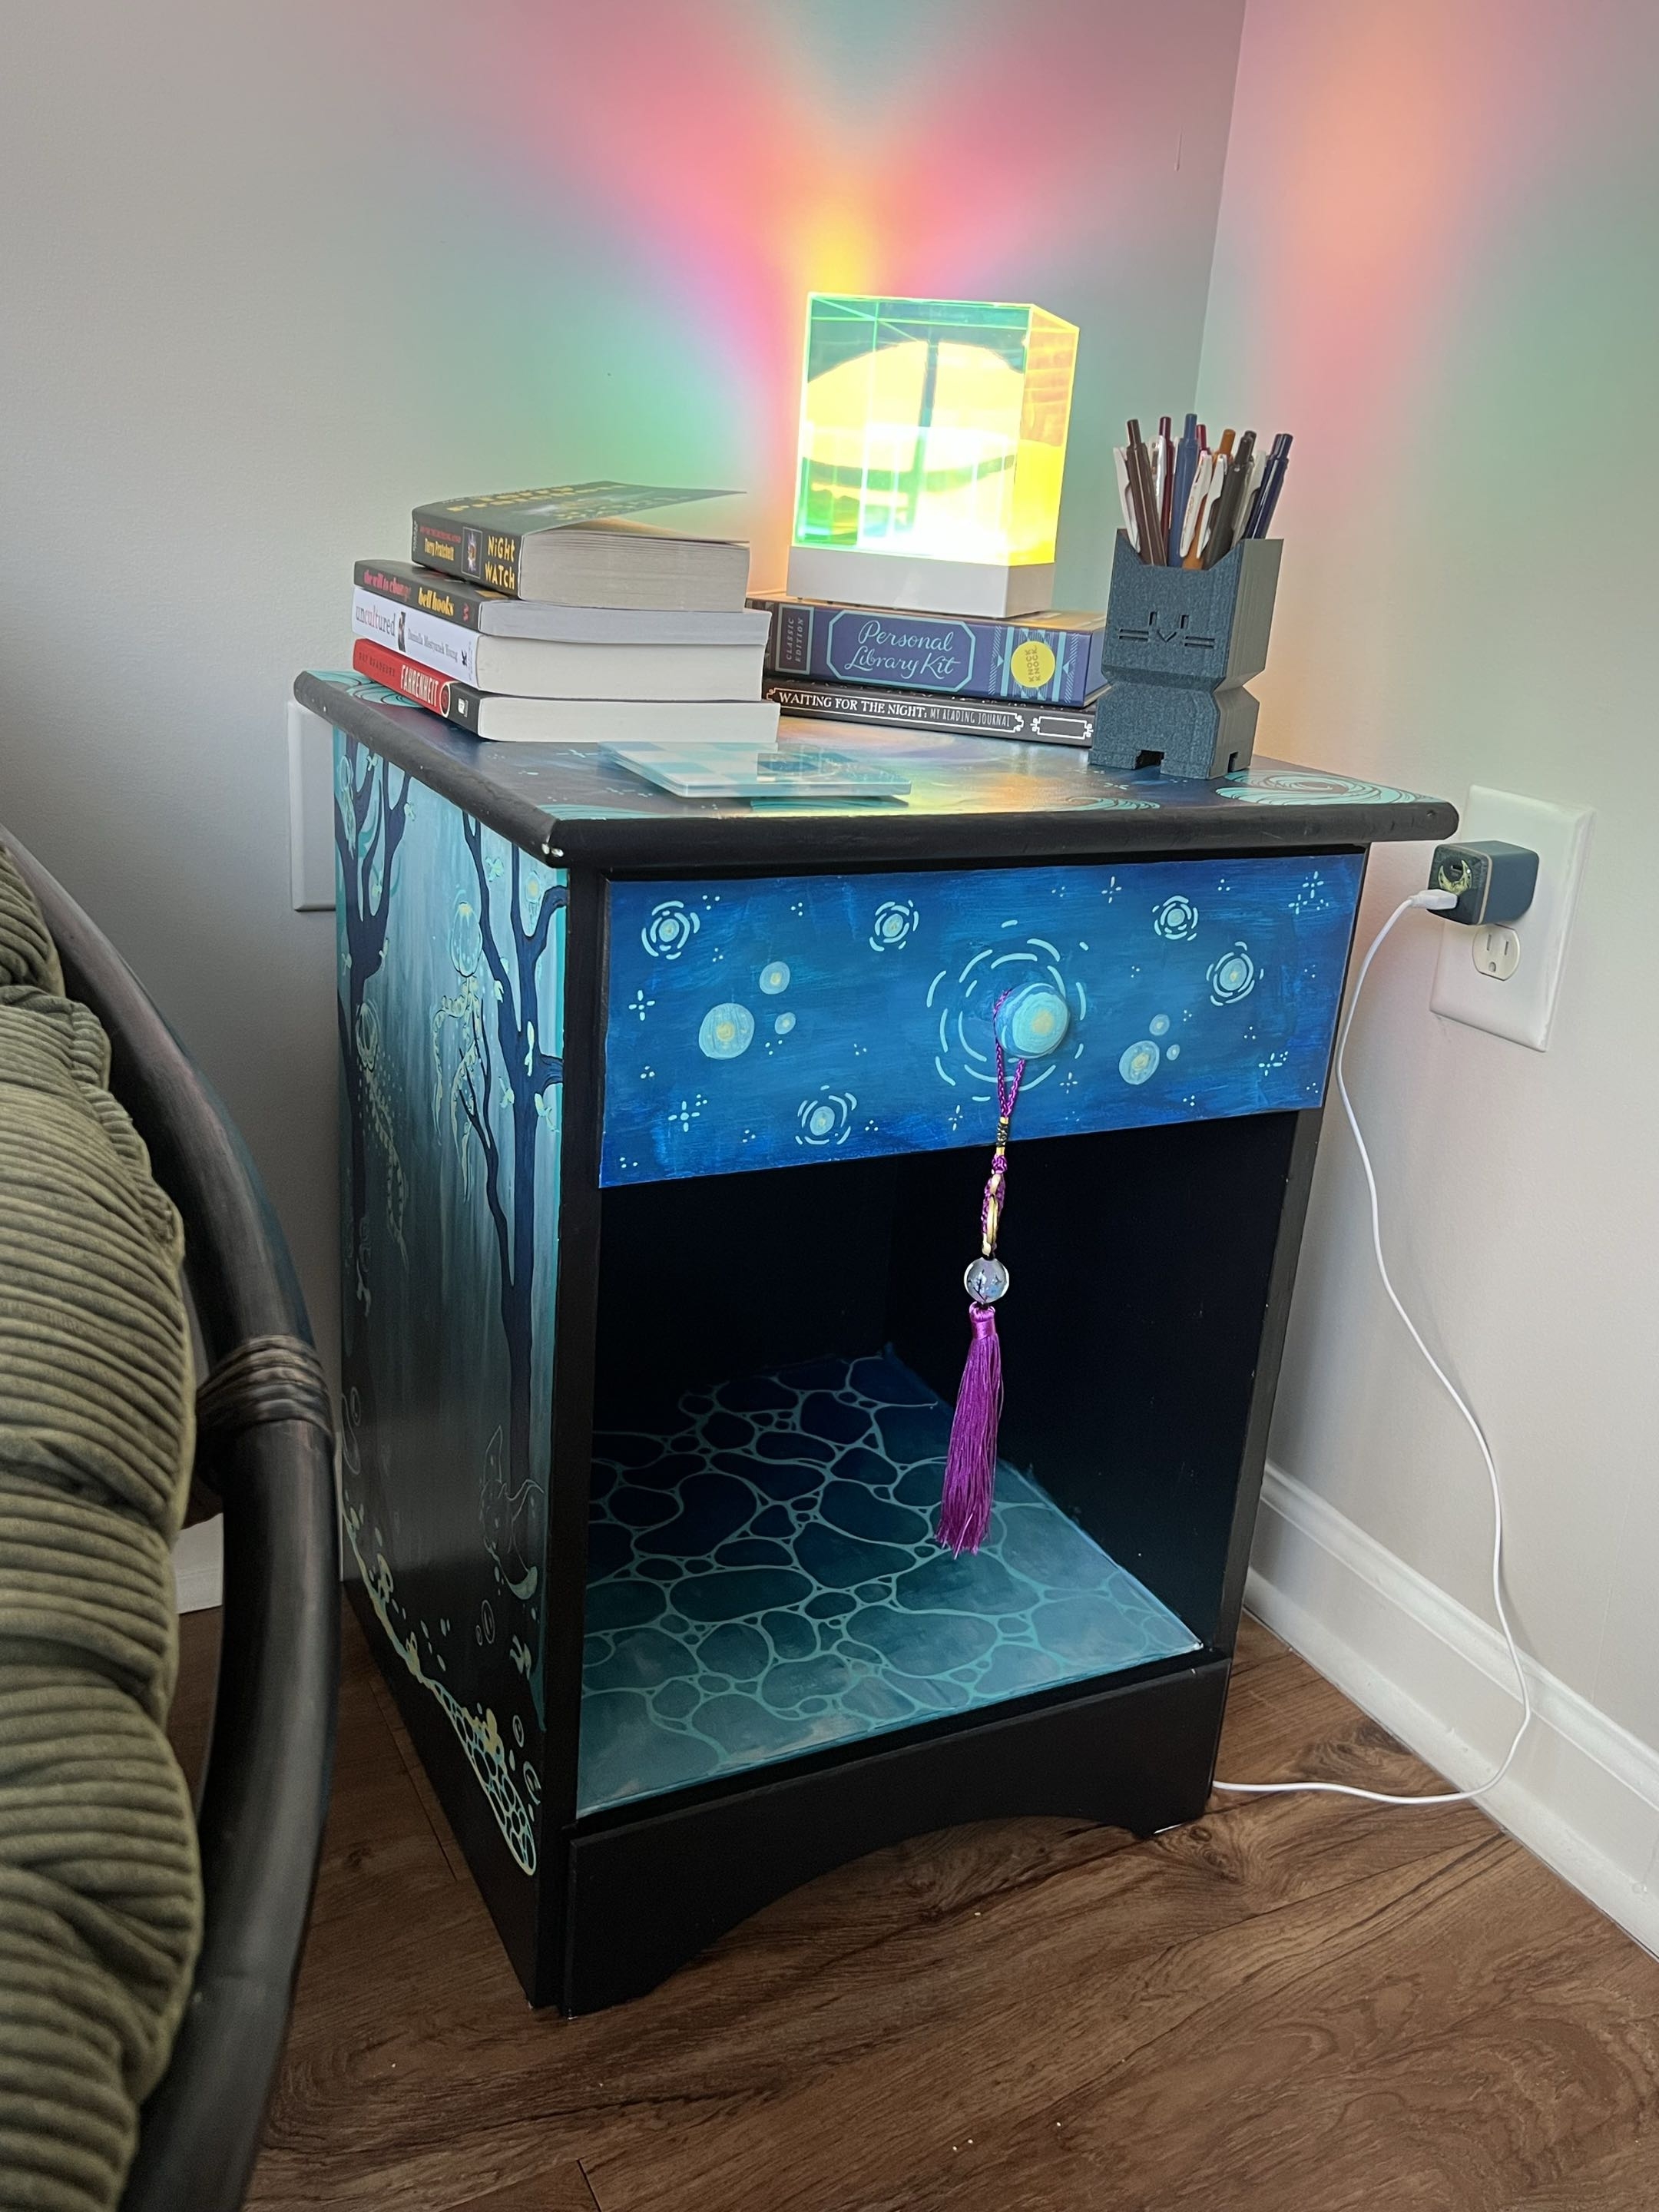
A few years ago, I found this washed-out baby blue nightstand at a thrift store for $5. It was made of mostly solid wood, and the brush strokes left behind on some of the bare wood told me a story of a parent lovingly painting it for a child’s bedroom. At the time, I purchased it with the intention of repainting it and turning it into a side table for my reading nook. I’d seen countless TikTok videos of people fearlessly upcycling trash finds and thrifted furniture to the beat of trending music; I knew I could do it, too.
One year passed…
And another…
Three years later, the nightstand was still that same washed-out blue (perhaps even more so since it hadn’t been primed or sealed). In that time, I’d painted three skateboards and I had no issues putting Posca pen to wood. With this, however, I kept hesitating even I knew that if I disliked the design, I could easily paint over my addition or even sand it off.
I began to realize that my hesitation wasn’t about skill or what I could or couldn’t do. I was afraid of creating the wrong thing. What if I spent countless hours painting only to end up hating the design? What if it didn’t match the image in my mind? What if… what if… what if…
Once I laid down the first few paint strokes, though, it’s like the spell was broken. I find my anxiety gives way to creativity when the sun goes down, and the indoor lighting casts every shot I film in a dour yellow that’ll be a nightmare to edit later. It’s worth it, though, just to start.
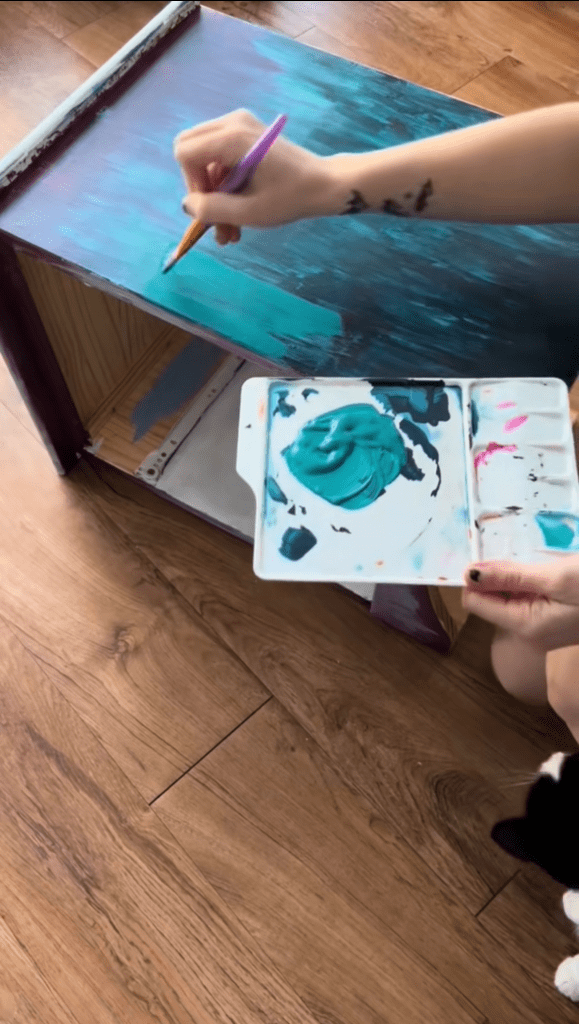
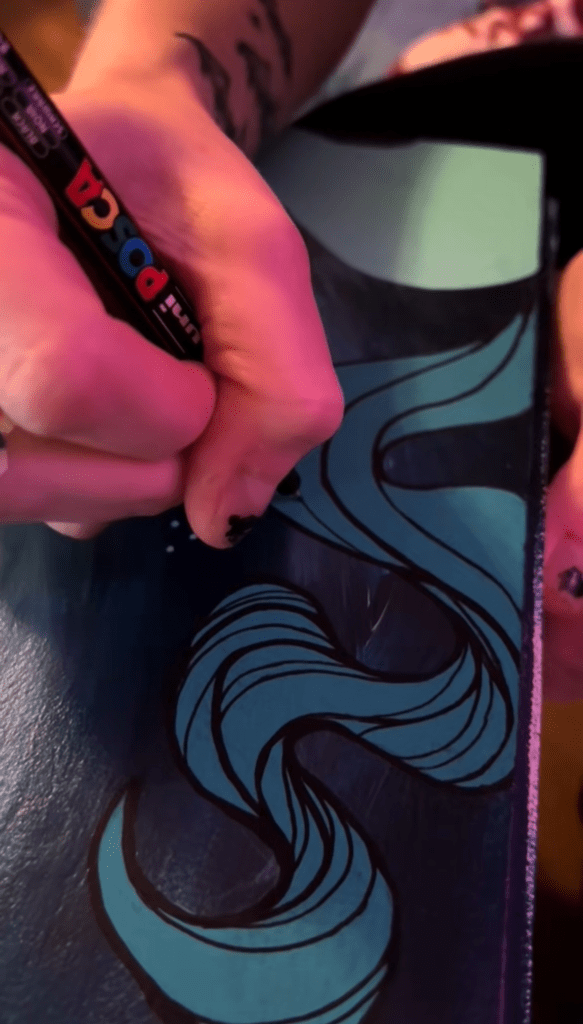

I began by painting the backdrop. Almost immediately, I hate it. The mistake gives me permission to keep working. Over a new background, I sketched random swirls of smoke on one side and the outline of trees on the other. I used materials I had around: mismatched paint types, Posca pens, Microns, and anything that laid down color. I stopped worrying about making everything match beyond the palette. I used different styles and themes.
On one side, I created a forest filled with floating lights. The other side featured a forest that was filled with spectral underwater creatures. On top, I painted “the feeling” of the moon. It was weird—it was whimsical.
I was almost sad when I ran out of space to paint. The process had become meditative for me rather than stressful, and I knew finishing it meant I would have to find a new project to occupy me.
Upcycling doesn’t have to be scary: what you create doesn’t have to be perfect and you don’t have to know what you’re doing going into it. Half of the fun is learning along the way. Here are few things I learned along the way, though, if you’re feeling inspired:
- Always start with a clean surface. It’s not uncommon for thrifted items to have a bit of grime or dust, so make sure you wipe them down. That makes it easier for the paint to stick and prevents grit from mixing into your paint while you’re working.
- If you’re feeling extra motivated, sand off the previous paint or use a primer over it. This will make it easier for the new paint to stick and give you an even undertone for the colors.
- Decide on the theme. The theme can be a color palette, an art style, or a subject. You can make everything match, or use a single element to unify everything.
- For example, with my side table, I used the same color palette but experimented with the style and subject matter. Since the color palette is the same, the design looks cohesive, even though it’s not consistent.
- Use what you have. Half of the joy of upcycling comes from using things up. I dig into my paint stash and mix and match leftover paint.
- It can make mixing different types or brands of acrylic paint a little more challenging if you’re not familiar with working them. Some have more or less pigment, or they might flow differently, which can affect how the paint works. Always keep a bit of cardboard or paper nearby to experiment on if you’re not sure how the paint will layer.
- Don’t be afraid to mix materials, either. I like to use a mix of paint markers and traditional paint. Just make sure that whatever you use doesn’t lift the previous layer (Posca paints lift easy because they’re water-based, so it’s better to use acrylic under them and then put the Posca on top).
- Protect your work. After you finish, be sure to seal your work so the paint doesn’t chip, smear, or fade.
- Make sure to use one that won’t disrupt the work underneath. I prefer spray sealants because they have less chance of smearing or smudging the work underneath. However, they can be tricky if you’re not used to working with spray paint.
- Always do a test spot no matter what you use to seal your work.
- Share and enjoy!

Leave a comment